

Sunday, September 11, 2011
Friday, September 9, 2011
Bobby Flay's Pickled Onions
A few weeks ago, my CSA included several sweet onions. Although onions have a good shelf life, I still didn't think I could use all of them before they went bad. Searching for things to make with them and being on a roll of pickling veggies, I ran across this recipe for pickled onions.
The reviews I read said these were pretty tart, so I cut back just a bit on the red wine vinegar. This recipe is easy, fun to make and perfect for burgers or salads.

Bobby Flay's Pickled Onions
2 large red onions, peeled and thinly sliced (I used sweet onions)
1 tablespoon olive oil
3 cups red wine vinegar
1/4 cup olive oil
2 tablespoons sugar
6 whole black peppercorns
4 sprigs fresh thyme
Garnish: 2 tablespoons finely chopped thyme
Directions
Saute the onions over low heat in 1 tablespoon of olive oil until soft. Place the vinegar, 1/4 cup of olive oil, sugar, peppercorns and thyme in a large noncorrosive saucepan and bring to a boil. Add the onions to the hot liquid and simmer for 5 minutes. Remove the pot from the heat and allow the onions to steep for at least 2 hours or overnight. (if storing overnight, place in a bowl and cover.) When ready to serve, drain the liquid and top with thyme.
I am linking this to Foodie Friday and Full Plate Thursday.
Friday, September 2, 2011
Freezer Cole Slaw
When I was in my early twenties, I made cole slaw for the first time for a family gathering. I am not sure what I did but the cole slaw was a BIG disaster and I haven't made slaw since. A few weeks ago my CSA included the biggest head of cabbage I'd ever seen and I decided to give cole slaw another try. After all, it's been 30 years, surely I can make a good slaw? I decide to make Tim's mom's Freezer Cole Slaw. Besides Snicker Salad, most holiday gatherings at Tim's moms include this slaw.
Tim said my salad wasn't quite as good as his mother's but it was good. Hey, I can live with that, it was so much better my first try years ago.

Freezer Cole Slaw
1 medium head cabbage (about 2 pounds), shredded
1 teaspoon salt
2 cups sugar
1 cup cider vinegar
1/4 cup water
1 teaspoon celery seed
1 teaspoon mustard seed
1 large carrot, shredded
1/2 cup finely chopped green pepper
Directions
In a large bowl, combine cabbage and salt; let stand for 1 hour.
In a large saucepan, combine the sugar, vinegar, water, celery seed and mustard seed. Bring to a boil; boil for 1 minute. Remove from the heat; cool.
Add the carrot, green pepper and vinegar mixture to the cabbage mixture; stir to combine. Transfer to large freezer bags; seal and freeze for up to 2 months.
Remove from the freezer 2 hours before serving. Serve with a slotted spoon. Yield: 10 servings.
I am linking this to Foodie Friday and Full Plate Thursday.
Wednesday, August 31, 2011
Chocolate Rice Pudding - Chocolate With Francois
I've never made rice pudding. Chocolate Rice Pudding seemed like a great first time! As far as Payard's recipes go, this is one of the easier ones. Most of the time is spent with the rice in the oven. The recipe calls for an hour's baking time, stirring every 20 minutes. Mine was beautiful after the first and second 20 minutes. I should have checked it again after 50 minutes instead of letting it go the full hour. Mine ended up over done and a little dry. The orange and chocolate flavors of this recipe are delicious and leave your kitchen with a wonderful fragrance.

Chocolate Rice Pudding was the recipe choice of Peggy of Pantry Revisited. You'll find the recipe over at her blog! Her pudding looks beautiful, just as Payard describes.
Thursday, August 25, 2011


Monday, August 22, 2011
Wild Blueberry Oat Muffins - Secret Recipe Club
This is my third month participating in Secret Recipe Club. Secret Recipe Club is the brainchild of Amanda of Amanda's Cooking. You're assigned a blog, you choose a recipe and keep it a secret until reveal day. How fun is that? Secret Recipe Club has become so popular, we've been divided into three groups. This month I am posting in Group B. Our host is Tina of Mom's Crazy Cooking.
My blog for this month is The Wednesday Baker. Andi has a lovely blog with lots of delicious recipes. After browsing on her blog several times, I settled on the Wild Blueberry Oat Muffins. I happened to have a pint of blueberries in the fridge and needed to make something for food day at hubby's work. Perfect!
I had some leftover crumb topping in the fridge. Instead of topping with sugar after baking, I decided to top with the crumb topping before baking.
The batter for these muffins is the most liquid batter I've ever seen. Usually, at least for me, muffin batter is thick. After putting these in the muffin tins, I read the recipe again, thinking maybe I'd read it wrong. That does happen to me quite a bit. No I read the recipe correctly. My muffins baked just shy of 20 minutes and were perfect. This is by far the best blueberry muffin I've ever eaten. They're moist with a nice soft crumb. The crumb topping added a beautiful finishing touch. I can't wait to experiment with this recipe with other fruits. Thanks Andi for a fabulous recipe!

Wild Blueberry-Oat Muffins
Paula Deen magazine July-August 2011
Courtesy of The Wednesday Baker
1 cup old-fashioned oatmeal
1 cup milk
1/2 cup packed brown sugar
1/3 cup vegetable oil
1 tbsp orange zest
1 egg
1 cup flour
1 1/2 tsp baking powder
1/4 tsp baking soda
1/4 tsp ground cinnamon
1/2 cup chopped pecans
1 1/2 cup fresh or frozen blueberries*
*keeping out 1/2 cup of the blueberries to sprinkle on top of the batter before baking
confectioners' sugar to sprinkle on top after baking
Place the milk and the old-fashioned oatmeal in a bowl, stir to combine and allow to set for 10 minutes.
Preheat oven to 425 degrees. Line 12 muffin cups with papers or spray muffins pan well with pam spray.
Add to the oatmeal the sugar, oil, orange zest, and egg and mix well. Mix together the flour, baking soda, baking powder and cinnamon and the nuts then add to the wet mixture. Stir just long enough to combine. Carefully stir in the one cup of blueberries and mix gently. Spoon into the baking cups, sprinkle the tops with the remaining blueberries. Bake at 425 degree for about 20 minutes or until golden brown. Remove from oven and allow to cool on a cooling rack. After they are cool sprinkle with the confectioners' sugar and serve.
I am linking this to Tasty Tuesday, Tempt My Tummy Tuesday , Tuesday's at the Table,.
Foodie Friday and Full Plate Thursday.
Friday, August 19, 2011
Squash Pudding
A couple of weeks ago my CSA contained quite a bit of yellow squash. Although we enjoy yellow squash, we always eat it grilled or in a stir fry. In searching for a different way to prepare yellow squash, I found this recipe for Squash Pudding.
If you've never had squash pudding, give this recipe a try. You'll think you're eating a vanilla custard or pudding. Or if you're looking for a great recipe to get your children to eat veggies, this one is perfect. You'll never know the main ingredient is yellow squash.

Aunt Bea's Squash Pudding
Adapted from Sustainable Table
Ingredients:
6 medium yellow squash
1 egg, beaten well
3/4 cup milk or half and half
3 heaping tablespoons flour
1 tsp vanilla
1/2 cup brown sugar
1/4 cup granulated sugar
Nutmeg
Directions:
Peel and cube squash and boil until soft. Puree in the blender. Add milk, vanilla, sugars, flour and egg. Sprinkle with nutmeg. Bake at 350 degrees 30-45 minutes until set.
I am linking this to Foodie Friday, Miz Helen's Full Plate Thursday and Sweet Tooth Friday.
Thursday, August 18, 2011
From The Good Life - Nebraska Wine and Balloon Festival

After several consecutive weeks of heat and humidity, last weekend we were treated to almost Fall like temperatures. What do people do when they've been held hostage in their house by this heat for weeks, they celebrate by attending the Nebraska Wine and Balloon Festival.

Along with thousand's of other Nebraskan's we enjoyed a beautiful evening of balloons, wine and music. Many of our favorite Nebraska wineries were in attendance. We sampled a couple of old favorites and discovered a new wine or two. My favorite was Dryline White from Superior Estates in Superior Nebraska. The Dryline White is one of the wines in their Tornado Alley Series. A perfect name for a wine from a winery on the Kansas/Nebraska line, tornado alley for sure!

Wine seems to be the weekend theme in August. Next up this weekend, the Riverfront Wine Festival. Unfortunately, due to flooding it isn't being held on the riverfront.
Tuesday, August 16, 2011
Celebrity Cook Along - Rachael Ray
For the past several months I've been participating in the Celebrity Cook Along hosted by Lynn at Happier Than A Pig In Mud. When I read that this month's celebrity was Rachael Ray I was thrilled, I already had a Rachael Ray recipe in my que. Or so I thought! Last night when I went to finish the post and link up, I realized the recipe was NOT Rachael's but Giada's. OOPS!
Fortunately, though I'd posted a lovely Rosemary Potato Frittata almost two years ago when I was first blogging. No one, except my husband and occasionally my son, was reading my blog, so I am posting this one again today. Rosemary is my favorite herb and this makes a delicious Sunday brunch or even weeknight meal.
Rosemary Potato Frittata
Adapted from Rachael Ray
1/4 cup olive oil
1 clove of garlic, chopped.
3 medium to large yukon gold potatoes
3 to 4 sprigs rosemary, finely chopped
Salt and freshly ground pepper
8 eggs, beaten
1/2 cup milk
1/2 cup parmesean cheese
1 tablespoon McCormick vegetable seasoning
Heat oven to 450 degrees.
Heat the olive oil in a cast iron skillet over medium low heat. Thinly slice the potatoes. Add the potatoes to the skillet and season the layers with rosemary, salt and pepper. Raise the heat and cook for 6 to 7 minutes. Carefully turn the mixture and cook for 5 minutes longer.
In a large bowl, wisk the eggs and milk together. Wisk in the parmesean and vegetable seasoning. Pour the egg mixture over the potatoes and lift the potatoes to allow the egg mixture to settle under them. Bake in the oven for 10 - 12 minutes. For the last couple of minutes, turn on the broiler to brown the top of the frittata. Watch carefully, so it does not burn. Remove from the oven and cut into slices and serve.

My notes on this recipe: The original recipe called for onion along with the potatoes, I am not a big fan of raw onions, so I omitted these. Next time, I think I will use them but saute them first. I added the vegetable seasoning to the eggs to give them a little more flavor. I put the Parmesan in with the egg mixture, the original recipe had it sprinkled on top for the last couple of minutes in the oven. I would like to try this recipe with another type of cheese, just to make it a little cheesier. Not sure what cheese will compliment the rosemary and potatoes, I think some type of savory cheese would be so good.
The recipe was a hit with my husband, although he couldn't resist telling me how good it would be with some MEAT in it, possibly some spicy sausage.
I am linking this to Celebrity Cook Along, Tasty Tuesday's, Tuesday's at the Table, Tempt My Tummy Tuesday.
Monday, August 15, 2011
Sunday Night Cake - Club: Baked
When Karen asked for my recipe choice for Club: Baked, I was drawn to Sunday Night Cake. The title of the recipe took me back to when my son was in high school, we had a pact to always have dinner together on Sunday night's. A cake that's perfect for Sunday night's sounded like the perfect recipe to me.
As I tend to do, a little too often, I made the recipe the day before the post was due. I read through it again and realized, I didn't have sour cream or cake flour. Quickly, I grab my keys and head to the closest store. Of course they had sour cream but did they have cake flour? Nope! I substituted all purpose flour and added 3 tablespoons of cornstarch. Well the second time I measured the flour I added cornstarch, the first time I added baking powder. You know those great new square plastic tubs you find cornstarch and baking powder in these days? This is the second time, I mixed them up. Can't remember what I was making the other time. You'd think I would have learned. I am reminded of my mom saying "Haste makes waste". Once I gathered the proper ingredients, the cake went together easily.
Oh I guess I also forgot to mention, I didn't have a 9 x 9 square pan or a 9" springform pan. I used an 8" springform and made a couple of cupcakes with the extra batter. My cupcakes were done after 20 minutes but the cake itself took almost 50 minutes. Probably because I made it in a smaller pan. My cake rose much higher than I would have anticipated. I sliced off the top so there would be a flat surface for frosting.
This recipe is all about the frosting. While this cake is moist with a wonderful texture, I thought it lacked flavor. The frosting reminds me of a lighter version of chocolate pudding and makes this cake. I can't wait to try this frosting again, maybe on a peanut butter cake? I am looking forward to reading the other Club: Baked members comments on this cake.

Sunday Night Cake
- 1 3/4 cups cake flour
- 2 teaspoons baking powder
- 1 teaspoon salt
- 1/2 teaspoon cinnamon
- 10 tablespoons (5 ounces) unsalted butter, room temperature
- 3/4 cup granulated sugar
- 1/2 cup packed brown sugar
- 3 large eggs
- 1 cup sour cream
Frosting
- 3/4 cup plus 2 tablespoons granulated sugar
- 3 1/2 tablespoons cornstarch
- 2 tablespoons dark unsweetened cocoa powder
- 3 ounces unsweetened chocolate, coarsely chopped
- 6 tablespoons (3 ounces) unsalted butter, cut into 1/2-inch pieces, at room temperature
Preheat oven to 350°F. Line a 9″ round cake pan (springform works great) with parchment paper. Melt a little butter and brush it onto the paper and the sides of the pan, then shake about 1 tablespoon of flour around the pan, disposing of excess. This will keep the cake from sticking.
Sift together flour, baking powder, salt and cinnamon. Set aside.
In a stand mixer, beat butter and sugars together until light and fluffy. Scrape down the bowl. Add eggs one at a time and mix until blended. Scrape down the bowl again.
Add the flour one scoop at a time, alternating with scoops of the sour cream. The last addition should be flour. Scrape down the bottom and sides of the bowl and mix a few more times to incorporate.
Pour batter into pan and bake 30-35 minutes. Allow cake to cool at least 25 minutes on a wire rack. Flip out of the pan and frost with the chocolate frosting.
Frosting instructions:
In a medium saucepan, whisk together the sugar, cornstarch and cocoa powder. Add the chopped chocolate. Pour 1 cup boiling water into the pan, wait 30 seconds, then whisk until mixture is combined and the chocolate is melted.
Turn the heat to medium-high and whisk continuously for about 5 minutes, or until the mixture begins to thicken. (Once pudding begins to thicken, it will come together very quickly.)
Remove the pan from the heat and pour the mixture into the bowl of a standing mixer fitted with the paddle attachment. Beat on high until the steam escapes and the mixture is room temperature. Add the butter and mix for an additional 2-3 minutes, until the frosting is light and pudding like. If you prefer a fluffier, more spreadable frosting, continue to mix for a few minutes longer.
Frost the top of the cake, allowing a little of the frosting to drip down the edges. Chill for 5 minutes to set the frosting. Serve immediately.
The cake can be stored, tightly covered, in the refrigerator for up to 3 days. Bring it back to room temperature before serving.
You can see what the other Club: Baked members thought of this recipe here! Next up for Club: Baked is Boston Cream Pie Cake!Sunday, August 14, 2011
Rhubarb Cupcakes - Martha Stewart Cupcake Club
Do you watch Cupcake Wars? My favorite part is seeing all of the flavors of cupcakes, icing and filings the bakers make. Inspired by Cupcake Wars, I decided to make a rhubarb syrup to flavor a cream cheese frosting. I used frozen rhubarb and was concerned they would be too wet. Quite the opposite, they were moist and delicious. The rhubarb cream cheese frosting just added that extra touch of sweetness.

If you have some rhubarb in your freezer and want a delicious cupcake, give this one a try. Lorraine, the PhDcupaker is our host for this month and you can find the recipe on her blog. You'll find the other MSC baker's cupcakes here!

If you have some rhubarb in your freezer and want a delicious cupcake, give this one a try. Lorraine, the PhDcupaker is our host for this month and you can find the recipe on her blog. You'll find the other MSC baker's cupcakes here!
Friday, August 12, 2011
Butter Pecan Ice Cream
My wonderful husband Tim celebrated his birthday a couple of weeks ago. When I saw this recipe on One Perfect Bite, I immediately bookmarked it to make for his birthday. Butter Pecan is Tim's favorite ice cream! Never having made Butter Pecan Ice Cream before, I was looking forward to making this recipe. The fact that I don't really care for Butter Pecan didn't hurt either. I knew I wouldn't be spooning out taste scoops straight from the freezer like I did with the Cake Batter Ice Cream a few weeks ago.
I substituted skim milk for the whipping cream and the recipe turned out great. I've found you make ice cream base with any combination of milk, half and half or cream. Even though butter pecan isn't my favorite flavor, I did try try a bite or two. This is a rich, delicious ice cream. If you like Butter Pecan, give this recipe a try!

As a side note, the beautiful blue dish and spoon were part of a set I won over at A Musing Potpourri. Thanks La for the fun prize!
Butter Pecan Ice Cream
Recipe Courtesy of One Perfect Bite
1/2 cup chopped pecans
1 tablespoon butter
1-1/2 cups half-and-half cream
1 cup packed brown sugar
2 eggs, lightly beaten
1/2 cup heavy whipping cream
1 teaspoon vanilla extract
Directions:
1) Melt butter in a small skillet set over medium heat. Add pecans and toast until lightly brown, about 6 to 8 minutes. Cool.
2) Heat half-and-half in a large heavy saucepan set over medium heat until it reaches a temperature of 175 degrees F. Add brown sugar and stir until dissolved.
3) Whisk a small amount of hot cream mixture into eggs. Add egg mixture to pan, stirring constantly. Cook and stir over low heat until mixture reaches at least 160 degrees F and coats a metal spoon. Remove from heat. Cool quickly by placing pan in a bowl of ice water; stir for 2 minutes. Stir in whipping cream and vanilla. Press plastic wrap onto the surface of custard. Refrigerate for several hours or overnight. Stir in toasted pecans.
4) Fill cylinder of ice cream freezer two-thirds full. Freeze according to the manufacturer's directions. Refrigerate remaining mixture until ready to freeze. Allow to ripen in ice cream freezer or firm up in the refrigerator freezer for 2-4 hours before serving. Yield: 1 quart.
I am linking this to Foodie Friday, Miz Helen's Full Plate Thursday, Sweet Tooth Friday.
Thursday, August 11, 2011
From The Good Life
Last weekend we went camping at Pawnee Lake, a beautiful state recreation area about an hour west of Omaha. Despite the closed roads due to flooding, our friends Karen and Larry made the trip up to join us.
Saturday we visited three wineries in the area. Our first stop was Deer Springs Winery, just outside of Lincoln. We tasted four whites and one red. We really enjoyed the Bianca. Biana is a cold hardy Vitis Vinifera cross developed in Hungary, where it is also known as Bianka or Ergi Csillagok. From Deer Creek we traveled to Raymond, the home of James Arthur, Nebraska's largest winery. We tasted six wines, I think it was four whites and two reds. We did enjoy the Nebraska White and the Nebraska Red, how original?! My favorite part of the visit to James Arthur was their wine cupcakes, a Red Velvet infused with the Nebraska Red. Our winery of the day was Windcrest, just down the road from James Arthur. Unlike James Arthur where the tasting room was crowded and somewhat commercial, we were greeted by the wine maker. He shared his thoughts on the flavor profiles and production of his wines. Our favorite was a wine that actually didn't contain any grapes. The wine was made from cherries and there's only one word to describe it, YUMMY!!!

After a fun day, we headed back to the campground. There were clouds in the area and we were hoping to get dinner in before the rain began. No such luck, we grilled between thunderstorms. Parts of Lincoln received heavy rain and 60 mile per hour winds. The rain kept us inside the camper and set up for an encore game of Farkle!
Despite the rain, we had a wonderful weekend with good friends!!!
Sunday, August 7, 2011
Cinnamon Peach Preserves - SMS
I am a little sad as I write this post, this will be my final post for Sweet Melissa Sunday's. Sweet Melissa Sunday's was the first group I joined when I first began blogging . The SMS bloggers are a great group and it's been so fun getting to all of them. Several of the bakers from SMS have formed a new baking group, Club: Baked! Thanks to Karen of Karen's Cookies Cakes and More for hosting SMS and creating Club: Baked.
As SMS draws to a close and I reflect on all of the recipes we've made, I contemplate which one's were my favorites. These preserves are in my top five. One of the reasons it's my favorite is because preserves have always been one of those recipes I wanted to make but thought it was too difficult. This recipe has shown me making preserves easy and fun. The flavor combinations are endless.
Summer brings beautiful, juicy peaches to the Midwest, making this the perfect August recipe. One of the unique things about Melissa's recipe is she uses Granny Smith apples instead of pectin. I added a bit of vanilla bean paste to this mixture, right before spooning it into the jars. The vanilla blends nicely with the cinnamon and peach flavors.

Our host for this week is Tessa of The Cooking Chemist. Tessa was the first blogger I "met" who lived in my town. I immediately became a follower and enjoy her blog. She's since graduated from pharmacy school and moved to Phoenix but I still follow her blog. You'll find this delicious jam recipe on her blog and you can check out the other SMS bloggers here!
I am linking this to Tasty Tuesday!
Friday, August 5, 2011
Green Bean Salad with Goat Cheese
I love browsing my favorite blogs or finding new blogs I've never explored before. How many food blogs do you think there are on the internet today? Every day I find at least one recipe to bookmark, often they're recipes I haven't made before or wouldn't normally make. Rarely do I prepare a main dish salad for lunch or dinner. When I saw this recipe and realized I had all of the ingredients on hand, it became the perfect Sunday lunch.
Everyone says you eat with your eyes. Anyone would be drawn to the vibrant colors in this salad. Fresh summer green beans, bright yellow corn and juicy red tomatoes make up the pallet for your eyes and feast for your stomach.
When I make this salad again, I would cook the green beans a little longer. While I enjoy my green beans crunchy, cooking just two minutes leaves them a little too crisp for my taste.

Green Bean Salad with Goat Cheese Dressing
Recipe Courtesy of Love & Olive Oil
Yield: 4 servings
Ingredients:
1 pound green beans, trimmed
2 ounces crumbled fresh goat cheese
Zest of 1 lemon
1 tablespoon lemon juice
2 tablespoons apple juice
1 garlic clove, minced
1/4 teaspoon freshly ground pepper
1/3 cup chopped fresh basil, divided
3/4 cup fresh corn (from 1 ear corn)
1 large tomato, diced
Directions:
Bring a large pot of water to a boil. Add green beans and cook just until they turn bright green and are barely tender, about 2 minutes. Alternatively, you can steam the green beans in a microwave save, lidded glass container. Fill with approximately 1 cup of water, and microwave on high for 2 to 3 minutes or until beans are crisp tender. Drain and rinse with cold water to stop the cooking. Pat dry.
To make the dressing, whisk together goat cheese, lemon zest and juice, apple juice, garlic and pepper in a small bowl. Toss green beans with half the dressing and half the basil or basil and spread on a platter. Top with corn and tomato, drizzle with remaining dressing and sprinkle with remaining basil.
I am linking this to Foodie Friday at Designs by Gollum and Miz Helen's Full Plate Thursday!
Thursday, August 4, 2011
In My Garden


Despite the heat and lack of rain, there's still a few beautiful flowers in our garden!
Tuesday, August 2, 2011
Faux Mashed Potatoes
A number of years ago when the Atkins Diet first became popular, a couple of the restaurants where I ate lunch served these Faux Mashed Potatoes. I'd actually forgotten all about them until a few weeks ago when I was searching for recipes for the cauliflower I'd received in my CSA basket. These are so delicious and if you use your imagination, you may just think you're eating mashed potatoes!

Faux Mashed Potatoes
1/2 head of cauliflower, trimmed and cut into florets
2 tablespoons Cream Cheese
2 tablespoon Butter
Salt & Pepper
Chives
Steam the cauliflower for 15 minutes or until tender. Drain and shake to dry. Using a hand mixer, blend the cream cheese and butter. Add the cauliflower and blend until smooth. Salt and Pepper to taste. Sprinkle with freshly snipped chives.
I am linking this to Tuesday's at the Table, Tasty Tuesday's, Made From Scratch Tuesday's,
Monday, August 1, 2011
Chocolate Mint Thumbprint Cookies - Club Baked
What do you think of when you hear Thumbprint Cookies? For me it's those peanut butter ones with the Hershey's kisses in the middle or the ones that are filled with jam. I am always intrigued when I see a new flavor for an old favorite. These thumbprints combine two delicious flavors, chocolate and mint, Andes Mints. I am reminded of standing at the cash register in a restaurant with my Dad, who always bought everyone present for the meal an Andes Mint.
This recipe goes together quickly and easily. The dark chocolate sticky dough, as with most thumbprints, is chilled before rolling them into balls. After chilling this dough for most of the afternoon, it was way too hard. I let it sit on the counter for about 10 minutes, way too soft. I put it in the freezer for about 10 minutes and rolled quickly. Trying to create the look of Andes Mints, I rolled a few of them in green sanding sugar. I did cheat, just a little on this recipe. I used Hershey's white chocolate kisses for the centers!

You can find the recipe for these little gems over at Jamie of Random Acts of Food. Check out the other Club: Baked member's thumbprints here!
Next up in two weeks, Sunday Night Cake, hosted by ME!
Sunday, July 31, 2011
My Favorite Flourless Chocolate Cake - Chocolate With Francois
I think my first experience with flourless chocolate cake was twenty or so years ago when I worked with a girl who had gluten allergies. Unlike today, when it seems everyone has some sort of food allergy, no one had ever heard of someone being allergic to flour.
As I was preparing to make this recipe, I realized I didn't have the bottom for my 9" springform pan. I think I left it at my mother in laws when I made her a cheesecake for her birthday. I did some research on using an 8" for a 9" recipe. 10 cups for an 9" and 8 cups for an 8". Perfect, I can put the extra in my mini cheesecake pans and save the balance to serve for dessert when friends come over next weekend. When I poured the 8 cups into the cheesecake pan, I didn't feel like there was enough batter in the pan, so I added one more cup. In the end, I think I could have used it all since these cakes don't rise.
Watch your cooking time very closely, flourless cakes can be dry. I tasted the mini one on the day I made it. It was just okay, a little sticky and not as rich in chocolate as I would have liked. I froze the larger one for about a week. This resulted in the perfect flourless chocolate cake, moist and fudgy, like a decadent chocolate brownie. This recipe is a keeper. It's easy and can be made in advance, the perfect dessert to serve at a dinner party.

Joanne at Apple Crumbles is our host this month. You can find the recipe on her blog.
Friday, July 29, 2011
Grilled Kohlrabi - CSA
I joined a CSA this year. For those of you who don't know, a CSA is Community Supported Agriculture. You find a local farm who basically sells "shares" of the farm in exchange for fresh produce and sometimes a little manual labor at the farm.
Early in the Spring, I started researching the local CSA's. Since there's just two of us, I needed find a farm that offered half shares. I wasn't having much luck and had almost given up when my husband sent me an email, Wenninghoff's Farm was offering to deliver CSA shares to my husband's work. Even better, they offered half shares. I was so thrilled, I'd found my CSA.
We're in our fifth week of the CSA and we're loving it. Today I am sharing with you a recipe from our first week, Grilled Kohlrabi. Kohlrabi isn't an every day vegetable, I think we'd eaten it once before a few years ago. Kohlrabi is available in green or purple and tastes like broccoli stems with a hint of cabbage flavor. The word kohlrabi is German for cabbage turnip (kohl as in cole-slaw, and rübe for turnip).

Grilled Kohlrabi
1 medium kohlrabi, peeled and cubed
Olive Oil
Salt
Pepper
Balsamic Vinegar
Toss the kohlrabi in olive oil, sprinkle with salt and pepper. Wrap in foil. Grill over medium heat for 45 minutes, until kohlrabi is tender. Remove from the foil. Adjust seasoning and drizzle with balsamic vinegar.
I am linking this to Foodie Friday and Miz Helen's Full Plate Thursday!
Tuesday, July 26, 2011
Asian Grilled Green Beans
I remember eating fresh green beans in the summer as a kid. Or at least I think they were green beans. Why is it a lot of my early veggie memories are of vegetables being cooked until they were almost mush? I remember my mom cooking green beans with onions and bacon for hours. I think I thought they were good but again I didn't know any better.
I soon realized green beans that aren't cooked for hours, are better than good, they're great! With the hot summer weather we've been having, anytime I can find a recipe suitable for the grill, it's a bonus! Since I didn't have any on hand, I omitted the fresh mushrooms. The red pepper flakes add a touch of heat and a nice kick to the green beans. This recipe is quick and easy, perfect for fresh green beans on a hot summer night!.

Asian Grilled Green Beans
Recipe courtesy of Taste of Home
- 1 tablespoon brown sugar
- 1 tablespoon sesame oil
- 1 tablespoon reduced-sodium soy sauce
- 2 garlic cloves, minced
- 1/2 teaspoon crushed red pepper flakes
- 1-1/2 pounds fresh green beans, trimmed
- 1 medium red onion, halved and thinly sliced
- 6 medium fresh mushrooms, quartered
Directions
- In a large bowl, combine the first five ingredients. Add the beans, onion and mushrooms; toss to coat.
- Place half of the vegetables on a double thickness of heavy-duty foil (about 18 in. square); fold foil around vegetables and seal tightly. Repeat with remaining vegetables.
- Grill, covered, over medium heat for 18-22 minutes or until beans are tender, turning packets over once. Open foil carefully to allow steam to escape. Yield: 8 servings.
Friday, July 22, 2011
Molasses Coffee Marinated Pork Chops
When Tim and I first began camping this summer, we purchased a Coleman Road Trip Grill. Although I love food grilled over an open fire, it can be a bit challenging especially when the temperatures are in the 80's and 90's. We enjoyed these pork chops on our recent Fourth Of July camping trip. No doubt our fellow campers thought we were a bit strange, always photographing our food.
When I first shared this recipe with Tim, he was a bit skeptical. I must admit, I wasn't 100% sold either but the reviews were excellent. Alton doesn't usually serve up disappointing recipes. I've always been a big Alton fan although he was a bit of a jerk on a recent episode of Food Network Star. Maybe it's all of the weight he lost? I know for a fact, people with a few extra pounds are happier :).
This recipe is a keeper. The molasses marinade makes a rich and delicious sauce. As it cooks down it thickens and the flavor develops. I wanted to eat it by the spoonful. This would be wonderful on chicken or even ribs. Give this one a try, you won't be sorry!!!

Molasses Coffee Marinated Pork Chop
Recipe courtesy Alton Brown
1 cup cool strong coffee
6 ounces molasses, by weight
2 tablespoons apple cider vinegar
1 tablespoon Dijon mustard
2 cloves garlic, minced
1 teaspoon kosher salt
1/2 teaspoon ground ginger
6 to 8 sprigs fresh thyme
1/2 teaspoon freshly ground black pepper
4 (6 to 8-ounce) bone-in, 1-inch thick pork chops
Directions
Place all of the ingredients into a 1-gallon zip top bag, seal, and shake to combine. Place in the refrigerator to marinate for at least 2 hours or up to overnight.
Preheat grill to medium-high.
Remove the pork chops from the marinade. Transfer the marinade to a small saucepan and place over high heat. Bring to a boil, reduce heat to medium-high, and boil gently, stirring often, until reduced to about 1/2 cup liquid, 12 to 15 minutes. Remove the thyme stems after the glaze has reduced. Meanwhile, grill pork chops 3 to 4 minutes per side or until they reach an internal temperature of 145 degrees F. Allow the pork chops to rest 4 to 5 minutes before serving with the glaze.
I am linking this to Foodie Friday and Miz Helen's Full Plate Thursday!
Thursday, July 21, 2011
From The Good Life -

Over the 4th of July weekend, Tim and I camped at Prairie Rose State Park, one of our favorite state parks. Friday was hot and humid but Saturday brought cooler temperatures and the rest of the weekend was beautiful.

On Saturday, we took a drive to see the Bridges of Madison County. You know the ones from the movie with Clint Eastwood and Meryl Streep. Tim was disappointed, he said he expected them to be larger, functioning bridges. After seeing the birthplace of John Wayne, we enjoyed a picnic lunch at the park in Winterset.

From Winterset we headed east to St. Charles to check out the Madison County Winery. It so happened on this particular day they were celebrating the grand opening of their brewery. Despite the crowd, we managed to belly up to the bar. We were served by the owners daughter who shared with us the bar was made from the crushed wine bottles her father had saved for 5 years. After tasting seven wines, we purchased a bottle of Summer Blonde, a semi sweet white wine.
Our travels then took us north to to Adel and Penoach Winery. The tasting room is in a 1917 barn. Not sure how many wines we tasted, our cordial host just keep saying oh try this one, now this one. We chose a Windmill Red, a red that reminded us of a Pinot Noir, which is quite unusual since Iowa wines tend to be sweeter. The last wine we tried was an apple wine made from local apples. We've tried apple wines before but this one had a touch of cinnamon. It will be wonderful to enjoy this wine, warm around the campfire this fall.
The balance of our holiday weekend was spent enjoying the beauty of Prairie Rose State Park!

Tuesday, July 19, 2011
Wild Blueberry Chews - Cookie Carnival
This is my second month baking with Cookie Carnival. In addition to trying new cookie recipes, the thing I love most about this group is there is no certain posting date. Most of the groups I participate in have a set posting date. Sometimes it reminds me of a school assignment, it's almost due and I haven't even started!
The two recipe choices for Cookie Carnival this month were Wild Blueberry Chews and Double Chocolate Espresso Cookies. I chose The Wild Blueberry Chews because they seemed to be the healthier option, can you say that about cookies?
After mixing the recipe, my dough seemed dry so I added an additional tablespoon of water. The recipe calls for dropping the teaspoons of dough onto the cookie sheet. I used my medium size scoop. When I checked them at 11 minutes, they hadn't flatted at all. I quickly grabbed a fork and flattened them.
When you read the title of this recipe, you'd think these cookies are "chewy" but they're not or at least mine weren't. I love the tartness of the blueberries mixed with the sweetness of the chocolate and the crunch of the almonds! These cookies are delicious!

Thanks to Tami for hosting Cookie Carnival. You'll find a recap of all of the Cookie Carnival bloggers on her site after the end of July!
I am linking these to Tuesday's at the Table, Tempt My Tummy Tuesday , Tasty Tuesday's and
Sweet Tooth Friday.
Monday, July 18, 2011
Secret Recipe Club - Lavender Lemonade Martini
This is my second month participating in Secret Recipe Club. When I received the email with my assignment, I couldn't wait to see which blogger been chosen for me. I was assigned Creative Culinary. What a lovely and delicious blog!
On a Saturday morning I sat at my computer scrolling through the hundreds of recipes on Creative Culinary. As I was scanning the recipes, I ran across many things familiar to me. There were posts of recipes from Nordstrom's Cafe, drinks from Yia Yia's and several versions of St. Louis Butter Cake. I started out with a list of six recipes: Nutella Fudge Brownies, Potato Chip Cookies, Lavender Lemonade Martini, Best Coffee Cake Ever, Hamburger Baked Bean Casserole and Olive Oil & Rosemary Cake.
I've been wanting to bake with Nutella! Potato chip cookies sound so fun. Who can pass up a martini? The casserole would be perfect for camping! My rosemary is growing like crazy. Which recipe to choose?
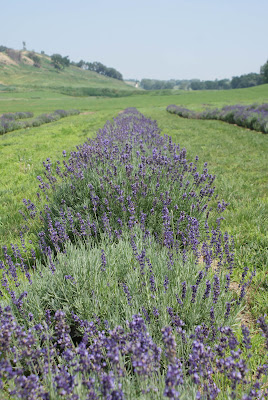
Inspired by Tim's and my recent trip to the Missouri Valley Lavender Farm, I chose the Lavender Lemonade Martini.A couple of summers ago I made some lavender simple syrup to use for cocktails. I think it ended up in the back of the fridge and not in the cocktails. Infused simple syrup is perfect for cocktails. It adds sweetness, along with a nice hint of lavender. This is a perfect summer cocktail or if you prefer, this makes a refreshing lavender lemonade.

Ingredients
On a Saturday morning I sat at my computer scrolling through the hundreds of recipes on Creative Culinary. As I was scanning the recipes, I ran across many things familiar to me. There were posts of recipes from Nordstrom's Cafe, drinks from Yia Yia's and several versions of St. Louis Butter Cake. I started out with a list of six recipes: Nutella Fudge Brownies, Potato Chip Cookies, Lavender Lemonade Martini, Best Coffee Cake Ever, Hamburger Baked Bean Casserole and Olive Oil & Rosemary Cake.
I've been wanting to bake with Nutella! Potato chip cookies sound so fun. Who can pass up a martini? The casserole would be perfect for camping! My rosemary is growing like crazy. Which recipe to choose?

Inspired by Tim's and my recent trip to the Missouri Valley Lavender Farm, I chose the Lavender Lemonade Martini.A couple of summers ago I made some lavender simple syrup to use for cocktails. I think it ended up in the back of the fridge and not in the cocktails. Infused simple syrup is perfect for cocktails. It adds sweetness, along with a nice hint of lavender. This is a perfect summer cocktail or if you prefer, this makes a refreshing lavender lemonade.

Lavender Lemonade Martini
Recipe Courtesy of Creative CulinaryIngredients
- 1 cup fresh squeezed lemon juice
- 1 cup sugar
- 1 cup water
- 6-8 sprigs of lavender
- sugar for rimming
- Vodka, preferably chilled
- lemon slices and lavender sprigs for garnish (optional)
Preparation Instructions
- Add sugar to water in pot on stove and bring to boil; cook only until sugar is dissolved. Add lavender sprigs and allow to cool completely.
- Put lemon juice in pitcher and strain lavender/sugar water into same pitcher.
- Add cup of ice to pitcher and stir well.
- Use a lemon slice to wet the edge of a martini glass. Rim the edge with sugar. I typically put a layer of sugar on a saucer and dip the top edge in it.
- Add ice to the glass and fill 2/3 with lemonade.
- Add 1/2 to a full shot of vodka, stir. Enjoy!
Sunday, July 17, 2011
Cake Batter Ice Cream
I hope everyone is having a wonderful weekend! We'd planned to take a camping trip to a state park about an hour west of Omaha. The hot weather, heat indexes of over 110, caused us to change our mind and stay home. The unexpected weekend at home left me with the time and motivation to cook and bake all sorts of summer treats!
If you live in the Midwest, you may be familiar with Sheridan's Frozen Custard. Sheridan's is a Kansas City based custard company with locations in Kansas, Missouri, Nebraska, Illinois and few other states across the US. I was thrilled when our first Omaha location opened a few years ago! My favorite treat at Sheridan's is a Be My Cupcake Concrete. My husband loves it when we go to the drive through and he get's to order the "Be My Cupcake" for me! It's a frozen treat made with vanilla custard, white cake and sprinkles.
I was looking for a similar treat to make at home, when I found this recipe for Cake Batter Ice Cream. Instead of cake and custard mixed together, cake mix is used for the cake batter flavor. In reading the comments on this recipe, I found a couple of people who used skim milk and half and half instead of heavy cream and whole milk. Awesome, anything I can to do to make ice cream a little less bad for you works for me. Several people also commented the recipe was a little lacking in flavor, so they added more cake mix. I used 1 cup of cake mix and 1 tablespoon of vanilla paste.
My cuisinart ice cream maker is several years old and just didn't seem to be freezing properly anymore, so I'd been thinking about getting a new one. A few weeks ago, while browsing the shelves at Goodwill, I found a Cooks Essentials for $7.99. It looked brand new, I am not sure it had ever been used. My new ice cream maker made the perfect consistency of ice cream! Gotta love a bargain!!
While it was freezing, I spooned out a taste. OMG this is so good! I had to make myself back away, I could have continued to spoon out way too many tastes. I can't wait to try a chocolate version of this recipe!
I love ice cream socials. As a kid, we always had an ice cream social at church to celebrate the end of Vacation Bible School. They were always so fun. Today I am participating in two ice cream socials in the blogsphere. Suzy at Kitchen Bouquet is having her third Ice Cream Social Weekend. I particpated last year with these Key Lime Ice Cream Sandwiches! In celebration of National Ice Cream Day, La at A Musing Potpourri is also having an ice cream social.
Enjoy!

Cake Batter Ice Cream
Recipe adapted from All Recipes
- 1 cup milk (I used skim milk)
- 1/2 cup white sugar
- 2 egg yolks, beaten
- 1 teaspoon vanilla extract (I used a tablespoon of vanilla paste)
- 2 cups heavy whipping cream (I used half and half)
- 3/4 cup yellow cake mix, sifted (I used 1 cup)
Directions
- Whisk together milk, sugar, egg yolks, vanilla, cream, and cake mix in a saucepan until well blended. Cook over medium-low heat until mixture reaches 160 degrees F (70 degrees C), stirring frequently. Remove from heat and place in the refrigerator or freezer until liquid is cold.
- Pour the chilled mixture into an ice cream maker and freeze according to manufacturer's directions until it reaches "soft-serve" consistency. Transfer ice cream to a one- or two-quart lidded plastic container; cover surface with plastic wrap and seal. For best results, ice cream should ripen in the freezer for at least 2 hours or overnight.
Friday, July 15, 2011
Bobby Flay's Grilled Sweet Potato Salad
This month's celebrity cook along over at Happier Than A Pig in Mud features Bobby Flay. Are you a Bobby Flay fan? Is it me or has Bobby mellowed a bit the past couple of years? Maybe, like me, people were finding him a bit arrogant. Whether or not you like him, one thing is for sure, the man can grill!
When I was planning our meals for Fourth of July weekend, I found Bobby's recipe for Sweet Potato salad. Tim's not a traditional potato salad fan. Since potato salad is synonymous with 4th of July, this recipe was perfect. I'd been wanting to try sweet potato salad!
The flavors in this salad are delicious. The sharpness of the balsamic vinegar, the sweetness of the potatoes and the salty bacon all compliment each other. This salad gets better after it sits a day or two and the dressing has a chance to soak into the potatoes.

Grilled Sweet Potato Salad with Bacon & Herb Vinaigrette
Recipe Courtesy of Bobby Flay
3 large sweet potatoes
1 T. plus 1/4 cup olive oil
8 oz bacon, diced
2 shallots, thinly sliced
1/4 cup red wine vinegar
1/4 cup fresh flat leaf parsley, chopped
1 t. fresh thyme, finely chopped
Salt and ground black pepper
1/4 cup canola oil
1. In a large pot of salted water, boil the potatoes until just cooked but not completely soft, 25 - 30 minutes, depending on the size. Test by piercing a potato with a thin bamboo skewer. (I used a fork) When the skewer meets some resistance but can slide all the way through, the potatoes are ready. Drain them immediately; set aside and let cool.
2. Heat grill to medium.
3. Heat 1 tablespoon of olive oil in a medium saute pan over high heat. Add the bacon; cook until golden brown and crispy. (I didn't add the olive oil) Remove the bacon with a slotted spoon to a plate lined with paper towels.
4. Return the pan to the heat, adding the shallots to the rendered fat, cook until golden brown and slightly caramelized, about 3 minutes. (I skimmed off most of the remaining bacon fat) Add the vinegar and cook for 1 minute. Remove the pan from the heat and whisk in 1/4 cup olive oil, herbs and salt and pepper to taste.
5. Cut the potatoes into 1/4 inch slices; brush both sides of the potato slices with canola oil and season with salt and pepper to taste. Grill until slightly charred on both sides and just cooked through, about 5 minutes total.
6. Place the potatoes in a bowl while they're still warm and gently toss with the dressing. Sprinkle with the crispy bacon. Serve warm or at room temperature.
Thanks to Lynn at Happier Than A Pig in Mud for another fun Celebrity Cook Along! In addition, I am linking to Foodie Friday and Miz Helen's Full Plate Thursday!!
Thursday, July 14, 2011


Tuesday, July 12, 2011
Santa Fe Noodle Bake
When Kraft first introduced Philadephia Cooking Cream, I received a coupon for a free tub. I knew I wanted to use it for some type of pasta dish. Inspired by some of the other noodle dishes I've made, I decided to make a noodle casserole. The cooking cream is a good substitute for sour cream or cottage cheese. If you have kids or are in the mood for comfort food, this dish is for you!!!

Santa Fe Noodle Bake
Ingredients

Santa Fe Noodle Bake
Ingredients
- 1 tub Philadelphia Santa Fe Blend Cooking Cream
- 1-¼ pound Ground Chuck
- 1 can 15-ounces Rotel Tomatoes
- ½ teaspoons Salt
- Freshly Ground Black Pepper
- 8 ounces, Egg Noodles
- 1 cup Grated Sharp Cheddar Cheese
Preparation Instructions
Preheat oven to 350 degrees.
Brown ground chuck in a large skillet. Drain fat, then add tomato sauce. 1/2 teaspoon salt and plenty of freshly ground black pepper. Stir, then simmer while you prepare the other ingredients.
Cook egg noodles until al dente. Drain and set aside.
In a medium bowl, combine Philadelphia Cooking Cream and meat mixture. Add plenty of freshly ground black pepper. Add to noodles and stir.
To assemble, add half of the noodle and meat mixture to a casserole. Top with half the cheese. Repeat with noodles and meat mixture and top with remaining cheese. Bake for 20 minutes, or until all cheese is melted.
I am linking this to Tasty Tuesday, Tuesday's at the Table and Tuesday Night Supper Club.
Monday, July 11, 2011
Meet Me On Monday
Happy Monday! I hope everyone had a wonderful weekend! There's no official Meet Me on Monday over at Never Growing Old today. I decided to go back and answer the questions from one before I started participating.
1. What do you put on your hot dog?
Mustard! About the only time I eat a hot dog is at a summer baseball game!
2. Do you play Sudoku?
Nope! Words with Friends and Angry Birds for me!
3. What is your favorite vegetable?
This is a hard one. I love vegetables. There's hardly any I don't like. I guess it would be asparagus!
4. Do you color your hair?
Violet red. Think Sharon Osborne, only not as violet!
5. What is your favorite brand of clothing?
I am more of a bargain than brand shopper. My favorite brand is whatever pair of jeans fit me!
How about you, what's your favorite veggie?
Saturday, July 9, 2011

Thursday, July 7, 2011
Lemon, Rosemary and Balsamic Grilled Chicken
In the summer we grill at least two nights a week. There's always chicken in my fridge and I'm frequently looking for new ways to grill it. I love it when I find a recipe that uses ingredients I have in my kitchen. Even better when it uses one of the herbs from my herb garden. This recipe does both of those things and it's delicious.

Lemon, Rosemary and Balsamic Grilled Chicken
Recipe courtesy of Emeril Lagasse
3/4 cup balsamic vinegar
1/2 cup olive oil
1/4 cup rosemary leaves
3 tablespoons thinly sliced garlic
2 tablespoons lemon zest
1 tablespoon crushed red pepper flakes
8 chicken thighs (I used chicken breasts)
Salt and freshly ground black pepper
Directions
In a medium bowl combine the balsamic vinegar, olive oil, rosemary, garlic, lemon zest and red pepper flakes. Whisk to combine and pour into a 1-gallon resealable food storage plastic bag. Put the chicken thighs in the bag and seal it. Turn to ensure that the chicken is evenly coated, then refrigerate, turning occasionally, for 2 to 4 hours.
Preheat a grill to medium-low and brush the grates lightly with an oil soaked cloth. Remove the chicken from the marinade and pat dry. Season the chicken well on all sides with salt and pepper, then place on the grill, skin side down. Cook the chicken about 8 to 10 minutes, turn and continue to cook an additional 8 to 10 minutes, or until the chicken is cooked through. Remove from the heat and serve while hot.
I am linking this to Foodie Friday at Designs by Gollum and Miz Helen's Full Plate Thursday!
From The Good Life - Tempo of Twilight

Omaha's botanical garden, Lauritzen Garden's has a concert series in the summer called Tempo of Twilight. Each concert features a different Omaha 70's or 80's cover band. On this particular night, we were treated to the tunes of The Fabulous Rogues. We enjoyed a bottle of wine and a picnic dinner in the beautiful setting of the garden's courtyard.

The garden is also featuring an exhibit of large scale ceramic sculptures by artist Jun Kaneko.

Tuesday, July 5, 2011
Graduation Candy Pops
A few weeks ago I was looking to make something fun for Mike's graduation party! I found this recipe for graduation pops on Bakerella's blog. When Mike saw them, he said "crafty"! We all laughed about the different meanings of "crafty". In this case, I am hoping he meant that in a good way.
You'll find the assembly instructions here! I used red hots for the tops and Ghirardelli chocolate squares for the mortarboards. These were easy to make. The most challenging part was finding all of the ingredients.
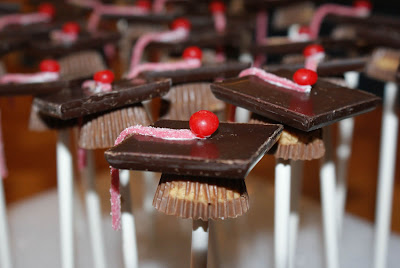
I am linking this to Tuesday's at the Table, Tasty Tuesday's and Tempt My Tummy Tuesdays!
Friday, July 1, 2011
NY Style Crumb Muffins & A New Baking Group
One of my favorite baking groups, Sweet Melissa Sunday's is coming to an end. We're baking two recipes for the next couple of months, with our last recipe in August. Besides Melissa's great recipes, the reason I've enjoyed this group so much is the other bakers. It's such a great group of women! I was thrilled when Karen from Karen's Cookies Cakes and More suggested we bake our way through Matt Lewis's Baked Explorations. I'd been wanting to buy this cookbook and now I have a really good reason to buy it! Not that I need another cookbook, I am not sure what the count is these days but I know it's way over 100.
When I read through the recipe for the NY Style Crumb Cake, I quickly realized this wasn't a low fat recipe. 2 1/2 sticks of butter? I knew this much butter would bring two things, a delicious cake and way too many calories! My solution, cut the recipe in half. When reading Karen's comments on the recipe, I noticed she'd had a failure with an 8" pan. Thinking maybe the pan was too small, I sent Karen an email and inquired about using a 9" pan. She quickly responded that the 8" pan was too big and I needed to use something smaller. I decided to use my large muffin tins.
Not being from New York, I was curious what a New York style Crumb Cake was. I think it's what we call a Coffee Cake in the Midwest. My crumb topping didn't seem to be sticking together enough to make these big crumbs. I didn't have the time or the patience to make a bunch of large crumbs, so I went with the topping as it was. There were some large crumbs, otherwise it was like a cake topping. My half recipe made 5 muffins. A couple were pretty large, so I think I could have made 6 muffins. I had quite a bit of topping leftover, which I saved for the next fruit crumble.
The recipe called for 60 minutes of baking time. I set the timer for 30 minutes and when I checked them, I was a little surprised to find they were done. I think they could have baked for 20 - 25 minutes. As the muffins rose, the topping spread out and in the end I didn't end up with as much crumb topping as I would have liked. That's probably why I have so much leftover!!!

OMG! These are so good. They have such a nice tender crumb and the flavor is delicious!
You can find the recipe here on Karen's blog and the links to the other Baked bakers's here!
I am linking this to Foodie Friday, Sweet Tooth Friday and Full Plate Thursday!
Tuesday, June 28, 2011
Crock Pot Chocolate Cake
If you follow my blog you know I use my Slow Cooker a lot. Nothing's better than coming home after work and having dinner ready to go. As you continue to use your slow cooker you learn some dishes are more suited to the slow cooker than others.
Until recently, I had never used my slow cooker for a dessert. A few weeks ago during one of our first camping trips, I tried this Apple Crisp. Wow, dessert does work in the slow cookert!! After my first success, I found this recipe for Crock Pot Chocolate Cake. I never would have thought a chocolate cake would bake in the slow cooker but it does. Don't expect the same texture as a cake baked in the oven. The texture of a slow cooker cake is more like a flourless chocolate or pudding cake. A trick I learned when I made the Apple Crisp is to take a towel or a few paper towels and put them under the lid. You'll find this absorbs the steam and moisture and helps the desserts to bake. If you're a camper, like I am or if you don't want to heat up your oven this summer, give this cake recipe a try!

Crockpot Chocolate Cake
- 1 pkg. two layer chocolate cake mix
- 3 oz. pkg. instant chocolate pudding mix
- 4 eggs
- 1 cup water
- 2 cups sour cream
- 3/4 cup vegetable oil
- 3/4 cup semisweet chocolate chips
- 1/4 cup milk chocolate chips
Preparation:
Spray a 4 quart crockpot with non-stick cooking spray and set aside. In a large bowl, combine the cake mix and pudding mix. In a medium bowl, beat the eggs with the water, then add the sour cream and oil and beat until smooth. Add to the dry ingredients and beat well. Stir in the chocolate chips.
Pour into crockpot. Cover slow cooker and cook on low for 6-8 hours, until top springs back when touched very lightly with finger. 8-10 servings
I am linking this to Tasty Tuesday's, Tempt My Tummy Tuesday and Tuesday's at the Table.
Subscribe to:
Posts (Atom)


