Saturday, July 31, 2010

Pink Saturday & Chocolate With Francois

It's not often that I have two blogging events on the same day! Today's one of those days. Both of these events deserve their own post. However, this blogger saved Chocolate With Francois until the last minute and after a long week at work didn't have the energy for two posts.

First we have Pink Saturday! Today I am featuring a beautiful pink flower from my garden. I have seen these called "Dinner Plate Hibiscus". This description is so fitting, these flowers are the size of dinner plates.


Now we're switching from beautiful pink flowers to delicious chocolate treats. This month's Chocolate With Francois creation is Chocolate Beignets. I love beignets but I have never made them. They're actually on my Top 50.

Since these need to be eaten right away, I decided to make 1/4 of the recipe. I had a little trouble with my math skills and ended up making the yeast mixture three times before I got it right. I know my division was accurate but the batter was way too thick. There was no way you could dip anything into the mixture. I added more beer until it was the consistency of a batter to be used for frying. I didn't feel like my ganache set up like it should but that could have been because of the heat and humidity. Once the ganache is set you roll the balls in egg, dip them in bread crumbs and then in the batter. This seemed more like something you would do for a main dish than a dessert but I assume it's to help keep the chocolate together while frying in the oil. The recipe called for a creme anglaise as a dipping sauce. It was already getting late so I skipped the creme anglaise.

Finally after an hour in the freezer, time to fry them. A couple of mine, exploded in the oil, maybe I didn't get enough bread crumbs around the chocolate? I had quite a bit of leftover batter. I put it in the fridge and am hoping to thin it down just a bit and make onion rings tomorrow night.


The verdict...I liked them but I didn't love them. They didn't really taste like a traditional beignet.This recipe is the pick of Julie from Always Leave Room for Dessert. If you want to give these a try, you'll find the recipe on her blog. Stop by Chocolate With Francois and see what the other members had to say!

Thursday, July 29, 2010

Potato, Leek and Fennel Soup

Time is running out to enter my giveaway. The winner will be chosen on Sunday. Good luck!!!

Have you cooked with fennel? Except for a slaw we made in the cooking classes I took earlier this year, I've never cooked with fennel. I am fascinated by the anise flavor and the fronds. Did you know the tops were called fronds? I didn't until I did some research on fennel. I couldn't pass up the beautiful fennel and leeks at the farmer's market. One of things I love most about cooking is finding recipes for ingredients I haven't used before. Of course, I turned to the internet and found this recipe on Epicurious for Potato, Leek and Fennel Soup.

If you like potato soup, you'll love this soup. It's a kicked up version of potato soup. The fennel gives it a great flavor. It doesn't have a strong anise flavor, just enough to enhance the taste. I used russet potatoes, added garlic and shallots. Besides the flavor, I love that this soup is creamy without any cream!


Potato, Leek and Fennel Soup
Adapted from Epicurious

2 tablespoons (1/4 stick) butter
2 cups sliced leeks (white and pale green parts only)
2 cups sliced fennel bulb, fronds reserved for garnish
2 garlic cloves, smashed and minced
1/2 shallot, minced
4 14 1/2-ounce cans low-salt chicken broth
2 pounds potatoes peeled, cut into 1/2-inch pieces (about 4 cups)
Freshly ground pepper, to taste

Melt butter in heavy large pot over medium-high heat. Add leeks, fennel, garlic, shallots and sauté until leeks are translucent, about 7 minutes. Add broth and potatoes and bring to boil. Reduce heat to medium-low. Simmer soup until potatoes are very tender, about 25 minutes. Working in batches, purée soup in blender. Return to same pot. Rewarm soup if necessary. Season with salt and pepper. Ladle soup into bowls; garnish with reserved fennel fronds and serve.

I am linking this to Foodie Friday at Designs by Gollum. Also, this is my entry for Souper Sunday's, hosted by Deb at Kahaki Kitchen.

In My Garden


Tuesday, July 27, 2010

Doggie Treats for Copper

I am having a giveaway, go here to enter! Good luck!

Tim and Michael went kayaking on the Niobrara River a couple of weekends ago. Copper always misses Tim when he's gone. To help him feel a little better, I decided to make doggie treats. Despite the 95 degree heat and humidity of 60 plus percent, I baked these. Copper thanked me by beeing a good dog for the rest of the weekend.


Copper loves peanut butter. It's what we use when we give him his heartworm medicine, so I knew he'd love these treats. My first inclination was to roll this dough out much thinner than it should be. These are different than cookies, there's nothing in them to make them rise. They pretty much bake in the same shape as when you put them in the oven.


Peanut Butter Dog Biscuits

½ cups water
½ cup oil
2 eggs
3 tablespoons peanut butter
2 tsp. vanilla
2 cups flour
½ cup cornmeal
½ cup oats

Blend wet ingredients together. Whisk dry ingredients together and mix into wet mixture to form a ball of dough. Roll out and shape. Put onto a non-stick cookie tray or lightly greased one. Cook 20 minutes at 400 F. Turn off oven and allow the biscuits to cool in oven until crisp and hard. Store in airtight container.

I am linking this to Tempt My Tummy Tuesday, Tuesday's at the Table and Tasty Tuesday's.

Sunday, July 25, 2010

Toasted Almond Lemon Bars - Sweet Melissa Sunday's

I am having a giveaway, you can enter here!!

Although I don't make them often, Lemon Bars are one of my favorite desserts. I love anything made with lemon.

The crust for this recipe goes together easily. I did feel like the crust was pretty sticky and soft. Maybe that was because it was hot and humid? Concerned about the crust being so soft it would spread, I put it in the freezer for about 10 minutes before baking. It turned out perfectly. This crust is delicious. As I scraped out the inside of the food processor, I tasted the batter. I could have eaten this by the spoonful. I made a 1/2 recipe. It worked beautifully in a 9" square pan. The filling is really runny but it sets up nicely.

I try to share the sweet treats I make. My taste tester, Tim ate one, make that two bars. I said "How about taking these to work tomorrow?" "Can't we keep them here? Michael and I will eat them this weekend." My guess if you make these you won't want to share them either. These are delicious! The almond crust gives them a nice hint of nutty flavor, a great contrast with the lemon.


You can find the recipe on Rebecca of the Indecisive Baker's blog. Rebecca, thanks for choosing a fabulous recipe! The links to all of the other SMS baker's are here!

Saturday, July 24, 2010

Pink Saturday & A Giveaway!!!

I love pink glassware. My husband's mother gave me these beautiful pink candlesticks. I found the Depression Glass Pink Sunflower plate at a flea market last Fall. I love that pattern and am in search of more pieces!


For the details on my giveaway, go here!!! The winner will be chosen on August 1st. Good luck and thanks for entering!!!

Happy Pink Saturday!! I am linking this to Pink Saturday at How Sweet the Sound!

Thursday, July 22, 2010

A Giveaway!!! & Peanut Butter Parfaits

Are you familiar with CSN Stores? I wasn't until a few months ago. CSN Stores has EVERYTHING, from dining room furniture to cookware. Do you like to shop? I LOVE to shop! Browsing and deciding what to buy is one of my favorite things. My mother used to call it window shopping!! As a reader of my blog, you're going to get the chance to shop!!! CSN stores is giving one of my readers (in the USA or Canada) a promo code good for $50.00 in merchandise from their stores.

How to enter is simple!! Sign up to be a follower of my blog and leave me a comment! If you're already a follower, just leave me a comment and you're entered. Also, I'd love to hear what you like to shop for or your favorite place to shop. I will be picking a winner on August 1st. Good luck and thanks for reading my blog!!!

Now for this week's Foodie Friday recipe...Peanut Butter Parfaits. One of the fun things about baking cakes to decorate is you always have leftover cake tops. It’s fun to come up with creative uses for them. Cake Pops are a fun creation to make with cake tops. My final cake for the Fondant and Gum Paste class I took last month, was a Peanut Butter Cake. No recipe for this cake, just a yellow cake mix with a 1/2 cup of peanut butter added. It’s moist and delicious.

I decided to make Peanut Butter Parfaits with my leftover cake. Parfaits are so fun and a smaller (much less caloric) version of a trifle. As I was riffling through my glasses, I realized I don’t own parfait glasses. I know I’ve passed them up numerous times at Goodwill, thinking oh one more set of glasses, I don’t need them. How about stemless wine glasses?

Peanut Butter Parfaits

Peanut Butter Cake
Vanilla Instant Pudding
½ cup peanut butter

Whisk ½ cup of peanut butter, gradually whisk in 2 cups of milk. When smooth, whisk in the instant pudding mix. Chill 10 – 15 minutes. Layer the pudding and cake, finishing with a layer of pudding. Drizzle the top with chocolate sauce.

These parfaits were a quick and easy dessert.


I am linking this to Foodie Friday at Designs by Gollum.

In My Garden


Tuesday, July 20, 2010

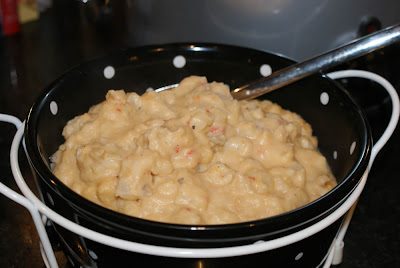
Cheesy Hash Brown Casserole

This is a family favorite, one you will always find at those holiday or birthday dinners. It’s also a recipe I go to when having dinner for a group. We had these ribs for Father’s Day and I asked Tim what side he’d like to go with them. How ‘bout that cheesy potato thing?, he said.

So the “cheesy potato thing” it is. It was a warm day and I try to refrain from using the oven on hot days. The way my kitchen is designed the heat just hangs in there and makes it miserable. I’ve made these before in my crock pot. The last time I made them, I did an hour on high and then about 3 hours on low. The hash browns didn’t seem done. I cooked these for an hour on high and then 4 hours on low. They turned out more like cheesy mashed potatoes but still were delicious. I think my mistake was I thawed these before I cooked them and I think that caused them to cook faster.

Cheesy Hash Brown Casserole

2 lbs. hash browns
1 tsp. salt
1/4 tsp. pepper
1/2 c. chopped onion
1 can cream of mushroom soup
1 can of cheese soup
1 c. milk
1 c. sour cream
2 c. grated cheddar cheese

Spray the crockpot with non stick cooking spray. Mix together the soups, onion, milk, sour cream and 1/2 of the cheese. Stir in the potatoes. Cook on high for 1 hour. Turn the crockpot to low and cook an additional 2 1/2 hours. Sprinkle on the remaining cheese and cook an additional 30 minutes.


I am linking this to Tasty Tuesday's, Tuesday's at the Table and Tempt My Tummy Tuesday's.

Sunday, July 18, 2010

Brownies & Key Lime Pie Ice Cream Sandwiches

You know how a lot of people seem to be in search of the best chocolate chip cookie recipe? For me, it's the best brownie recipe. The Omaha paper had a best brownie contest a few weeks ago. I submitted my favorite recipe. My recipe wasn't chosen but it was fun to enter. When I saw Tiffany of A Spoonful and a Heap had chosen Chocolate (Walnut) Brownies for this week's SMS, I wondered if this one would end up being my new favorite.

The recipe calls for 45 to 50 minutes of baking time. Since my oven tends to run a little hot, I set it for 40 minutes. I didn't check it before the 40 minutes were up. I should have. 40 minutes was too long. Not that these are overdone, they're just not that "ooey gooey" brownie that I love. The flavor was pretty good but I like my "ooey gooey" brownies to be really chocolatey. These didn't have enough chocolate for me. They also tasted a little salty. I think that means when I didn't think I'd put the salt in, I already had :).

In honor of National Ice Cream Day, Suzy at Kitchen Bouquet is having an Ice Cream Social. All week, I've been contemplating what to make. Since these brownies came out a little dry, how about using the not so "ooey gooey" brownies for Ice Cream Sandwiches?

Recently, I've seen a couple of recipes on the blogsphere for Key Lime Pie Ice Cream.
After some searching, I found this Food Network Recipe. As luck would have it, I had all of the ingredients on hand. No trip to the store required, that's a good thing. I omitted the lime zest. My experience with zest in ice cream, is it all seems to gum up in one spot. Also, no graham crackers needed since, I was using this for ice cream sandwiches.

I wish I had planned in advance to make these brownies for ice cream sandwiches. I'd have used a different pan, one where they would have been thinner. I decided to take a chance and cut them in half. I had some casualties, so I have multiple sizes of Ice Cream Sandwiches.

If you like the flavor of key limes, this ice cream is for you. It's very tart but the chocolate sandwiches help balance it out. I can't wait to try Ice Cream Sandwiches again and this time I will plan in advance.


Key Lime Pie Ice Cream
Courtesy of Food Network

1 1/2 cups sweetened condensed milk
1 1/2 cups heavy whipping cream
1 cup lime juice
1 teaspoon lime zest
4 to 6 graham crackers, for garnish
Directions
Mix ingredients together and refrigerate until cold. Pour into ice cream maker and mix for 12 to 15 minutes. Transfer to another container and place plastic wrap on ice cream and cover container tightly with a lid. Place in freezer for several hours.

When ready to serve, garnish with graham crackers.

Saturday, July 17, 2010

Happy Pink Saturday!

I always plant a pot of geraniums for my deck. Normally by this time of year, they're starting to look a little parched from the heat and the wind. We've had lots of rain this year and the geraniums are looking beautiful!


I'd like to introduce you to Natasha of 5 Minutes Just for Me. She just made the most amazing Zebra Cake. Stop by and take look!

I am linking this to Pink Saturday at How Sweet the Sound!

Thursday, July 15, 2010

Looks Can Be Deceiving - Garlic Scape & Basil Pesto

This is one of those recipes where I have to say, trust me this is delicious. I wish I had sprinkled some basil on the top of this for color. It doesn't look very appealing but it was delicious!

Garlic scapes are the flower stalks found on members of the Allium family (onions, leeks, chives, and garlic). Garlic scapes, which only appear on the finest hardneck garlic varieties, curl upward as they grow, straighten, and then grow little seed-like bulbs. When the garlic scapes are still in full curl, they are tender and delicious.

A few weeks ago, I picked up some garlic scapes at the farmer’s market. I’d never cooked with them before. At the stand where I purchased them, the grower said she uses them wherever she would use garlic. They can be used in frittatas, pasta and stir fry’s. When you use them in stir fry’s, they add a natural cornstarch like thickener.

We love pesto in the summertime. When I saw this recipe for Garlic Scape and Basil Pesto, I couldn’t wait to try it. Also, I was intrigued because this recipe uses almonds. I always make my pesto with those wonderful, yet expensive pine nuts.

This pesto is a refreshing change from traditional pesto. The garlic scapes add a nice bite and the almonds add a sweetness to the pesto.


Pasta with Garlic Scape and Basil Pesto
Courtesy of Serious Eats

- serves 4 -

Ingredients
4 to 5 garlic scapes, roughly chopped
Large handful basil leaves
1/4 cup almonds, toasted in a dry skillet until slightly browned
1/2 cup olive oil
1/2 cup Parmesan cheese
1/2 teaspoon salt
1 pound linguine or other pasta

Procedure
1. Combine the garlic scapes, basil, and half the oil in a small food processor or blender. Process or blend until the leaves and scapes are finely chopped, then add the nuts and remaining oil. Process or blend until nicely pureed.

2. Remove to a bowl and stir in the cheese. If necessary, add more olive oil to create a loose paste. Season with more salt if needed.

3. In the meantime, bring a large pot of salty water to boil and cook the pasta until al dente. Drain, reserving 1 cup of the pasta water, and toss with the pesto. If necessary, add some of the pasta water to create a creamy texture. Serve with more grated Parmesan cheese.

I am linking this to Foodie Friday at Designs by Gollum. Also, I am participating in my first Presto Pasta Nights. Pam from Sidewalk Shoes is hosting this week. I love her blog, stop by and check it out.

In My Garden


Tuesday, July 13, 2010

Rosemary Apple Smoked Pork Loin

When the weather is nice, we cook on the grill at least times a week. Pork loins are so easy to do on the grill. Remember years ago everyone thought you had to cook pork to temperature of at least 160, so you wouldn't get trichinosis? I certainly remember my mother cooking pork chops until they were like shoe leather. We've started cooking our pork to a temperature of 135 and letting it rest for about 15 minutes. This creates the juiciest pork you've ever tasted.

We decided to use a really simple preparation for this pork loin. For something different, we decided to smoke the pork loin. Before smoking, I used this rub. When we cleaned up the flower beds this Spring, I found the remains of last years rosemary plant. Although it didn't survive our long, cold winter, it still had the wonderful fragrance of rosemary. I cut it down and gave it to Tim to use to smoke something on the grill. We smoked the loin in a combination of the rosemary and apple wood.


I am linking this to Tempt My Tummy Tuesday, Tuesday's at the Table and Tasty Tuesday's.

Sunday, July 11, 2010

Sour Cherry (Cranberry) & Almond Biscotti - SMS

Some weeks I am on the fence whether or not to bake SMS. This week, I knew I wanted bake this biscotti. I love biscotti and these flavors sounded delicous. Despite some of the other SMS gals comments about how awesome the dried cherries are, I always to try to use what I have on hand. I use the dried cranberries I had in the cupboard. The recipe called from almond and vanilla extract. No almond extract in the cabinet, so I added a little extra vanilla. This recipe goes together quickly and easily. I thought the dough seemed really wet. Don't you just love those moments where you second guess yourself and wonder if you put in all of the flour? I decided to add another 1/4 cup of flour. I'm glad I did!!! The texture was perfect.

After cutting these for their second bake, I decided to taste one of the ends. Yum! I also thought they seemed done at that point. Based on this, I decided to shorten the second baking time for a less crunchy cookie. The recipe called for baking them an additional 60 minutes. I shortened the time to 30 minutes.


I love this recipe. I can't wait to experiment with the flavors on this one. These are going on my list for this year's holiday treats.

Thanks to Tracey of Made by Tray Tray for choosing this week's awesome recipe. Stop by here to check out all of the other SMS gals biscotti.

Saturday, July 10, 2010

Pink Saturday Cake

Happy Pink Saturday!!!

I just completed the Wilton Fondant and Gum Paste classes. I love working with fondant. Fondant reminds me of play dough. It's a therapeutic reminder of childhood, fun to work with and the possibilities are endless!!

Today for Pink Saturday, I am sharing my cake from the class. Of course, it's PINK!!


If you have time today, stop by and say hello to my friend Peggy's at My Affairs with Art and Daily Life. Peggy's husband is recovering from a stroke. I know she'd love hello's from all of the "Pink Saturday Gals".

Thanks to Beverly at How Sweet the Sound for hosting this Pink Party every Saturday!!!

Thursday, July 8, 2010

Scallop Stir Fry

Do you have an iPhone? If you do, I would recommend the Martha Stewart Everyday Food app. It's only .99 cents and you are receive a new recipe everyday. The philosophy behind Everday Food is simple, to create simple, healthy recipes. Most of these use ingredients you probably have in your kitchen and can be created in under 30 minutes! For someone who works full time, it's a wonderful tool to have at your fingertips.

We don't have scallops often but enjoy them whenever we do! Of course in the Midwest, our best option is to buy them frozen. I found a bag of Sashimi grade scallops on sale at Aldi.

To increase the veggies, I added broccoli. It's a delicious and easy weeknight supper!

Scallop Stir Fry
Adapted from Martha Stewart Everyday Food

1 tablespoon olive oil
1 pound small sea scallops, side muscle removed
Coarse salt
1 small onion, halved and sliced 1/4 inch thick
1 tablespoon grated peeled fresh ginger
1/2 pound sugar snap peas, trimmed
1/2 pound broccoli
2 tablespoons fresh lime juice
1/2 teaspoon Asian garlic-chili sauce
1/2 cup loosely packed fresh cilantro leaves

Directions
1.In a large (12-inch) nonstick skillet over high heat, warm oil, about 1minute; swirl to coat bottom of pan evenly. Add scallops, flat sides down, and cook until browned on both sides, 2 to 3 minutes per side. Season with salt. Transfer to a plate.
2.Reduce heat to medium. Add onion; cook, stirring, until browned, 1 to 2 minutes. Add ginger, sugar snap peas, and 1/2 cup water; cook, stirring occasionally, until peas and broccoli are crisp-tender and water has evaporated, about 3 minutes. Remove from heat.
3.Add scallops, lime juice, chili sauce, and cilantro. Toss to coat. Season with salt, as desired.


I am linking this to Foodie Friday at Designs by Gollum.

In My Garden


Monday, July 5, 2010

Barn Quilts

Last Fall Tim and I took the backroads home from his Mom's and happened across the Barn Quilts of Sac County. A few weeks ago, as we were leaving Tim's moms house, Tim suggested we take the route home that goes through Sac County and photograph some of the barn quits.

Traveling south from Tim's moms, internet service is sketchy . I did my best to map out a route to find the barn quilts, suggesting to Tim next time we should map it out in advance. I am the planner, he's the spur of the moment guy.

Here's six of the ten barns we photographed. I hope you enjoy them as much as we did.


Double Windmill


Indian Trails


Corner Posts


Variable Star


Calico Star


Turnabout T

Sunday, July 4, 2010

Saturday, July 3, 2010

Pink Saturday - Quinoa, Beet and Walnut Salad

Happy Pink Saturday!!! We're on an extended Fourth of July weekend trip. I will visit everyone's blogs when I return.

One of my favorite veggies from the Farmer's Market is beets. I never used to like beets but I think that's because I'd only eaten them pickled. A couple of summer's ago, I discovered roasted beets. They are so sweet and so easy to prepare. Just cut off the tops, rub in olive oil, sprinkle with salt and pepper, wrap in aluminum foil and roast in a 400 degree oven for an hour. Test for doneness, they should be fork tender. Once they have cooled, rub off skin. I use rubber gloves so I don't end up with beet colored hands. Slice and enjoy.

Most days, I come home for lunch. I am always looking for something different for lunch. I found this recipe. How perfect, I had leftover quinoa in the frig. I added black beans for protein. Not only is this a beautiful pink salad, it is delicious!!!

Quinoa, Roasted Beet and Walnut Salad

3-4 medium beets, washed and trimmed (do not peel)
1 c. (240 ml.) dry quinoa
2 cups (480 ml.) water
1/2 c. (120 ml.) walnuts, lightly roasted and cooled
2 cloves of garlic, minced
grated rind of one lemon
juice of one lemon (about 1/4 cup)
2 T. (30 ml.) balsamic vinegar
1/4 c. (60 ml.) extra-virgin olive oil
2 tsp. (10 ml.) dijon mustard
1 tsp. sugar
1 can black beans
1/3 cup (80 ml.) fresh cilantro, chopped
salt and pepper to taste

Preheat oven to 425 F. Wrap beets in foil and bake until extremely tender, about 45 minutes-1 hour. Let cool, then peel off the skins and dice into 3/4 inch (2-cm.) cubes. Set aside.

Bring water to boil in a small heavy saucepan. Rinse quinoa well and add to water. Return to boil, then reduce heat to low and cover. Allow to simmer, untouched, for 25 minutes, then check to see if water has been absorbed. If not, continue simmering until all water is absorbed, then uncover and allow to cool. (If you are in a hurry, you can turn the hot quinoa into a glass bowl at this point and place it in the fridge for about 30 minutes).

In a nonstick frypan, heat oil and add garlic and lemon rind. Cook and stir for 2 minutes, then add balsamic vinegar, lemon juice and stevia. Remove from heat.

Add beets to cooled quinoa. Break walnuts into pieces and add to the bowl. Pour dressing over and toss well until quinoa is tinted pink. Add cilantro and combine well. Season to taste with salt and pepper. This salad is even better the second day, after flavours meld. Makes 4 servings.


I am linking this to Pink Saturday at How Sweet the Sound!

Friday, July 2, 2010

Banana Oatmeal Bread

Do you have bananas in your freezer? There's always bananas in mine!! My favorite recipe for banana bread is this one! I am always looking for a recipe that's healthier but just as delicious. When I saw this recipe on The Cooking Chemist, I knew I had to give it a try. This one is a home run! It's healthier but still moist and delicious.


Banana-Oatmeal Bread
Courtesy of The Cooking Chemist
Adapted from Cooking Light

Ingredients:
1 c. packed brown sugar
7 Tbsp. canola oil
2 large egg whites
1 large egg
1-1/3 c. mashed ripe bananas (about 2 large, defrosted if frozen)
1 c. regular oats
1/2 c. fat-free milk
1 tsp. vanilla
2 c. all-purpose flour
1 Tbsp. baking powder
1/2 tsp. baking soda
1/2 tsp. salt
1/2 tsp. cinnamon

Preheat oven to 350 degrees.

Combine first 4 ingredients in a large bowl, beat well at medium speed of a mixer. Combine banana, oats, and milk; add to the sugar mixture, beating well. Add vanilla and mix well. Lightly spoon flour into dry measuring cups and level with a knife. Combine flour, baking powder, baking soda, salt, and cinnamon; stir with a whisk. Add to sugar mixture and beat until just moist.

Coat a 9x5-inch loaf pan with cooking spray. Spoon in batter and bake at 350 degrees for 60-70 minutes or until a toothpick inserted into the center of the loaf comes out clean. Cool ten minutes in pan on a wire rack. Remove from the pan and cool completely before storing.

Thursday, July 1, 2010

In My Garden